Play the course like a pro
Discover how to play each hole of La Reserva Club.
Hole 1
Par: 4 | HCP: 10
A dog-leg left, very reachable par 4. The second shot to the diagonal green is defended by a rocky water hazard at the front. The green is expansive with several contours.
Stadistics
| Black | White | Yellow | Blue | Red |
| 395 | 381 | 364 | 344 | 323 |

Hole 2
Par: 5 | HCP: 5
An inclining par 5 with a wide fairway from the tee. A tough second shot has to avoid bunkers in the middle of the fairway. The narrow, undulating green is defended by bunkers to the front and is possibly one of the most difficult on the course.
Stadistics
| Black | White | Yellow | Blue | Red |
| 502 | 482 | 460 | 428 | 401 |

Hole 3
Par: 4 | HCP: 9
Keep the tee shot to the right side to avoid out of bounds and olive trees on the left. The expansive green, which slopes away front to back and from right to left, is well protected by bunkers on both sides. Beware, wind can often be a feature on this hole.
Stadistics
| Black | White | Yellow | Blue | Red |
| 406 | 393 | 371 | 338 | 312 |

Hole 4
Par: 4 | HCP: 3
Important to get off the tee and clear as much of the gully as you can, which will still leave a long second shot. A narrow approach to the green is made harder by a steep right side incline.
Stadistics
| Black | White | Yellow | Blue | Red |
| 429 | 428 | 386 | 355 | 330 |

Hole 5
Par: 3 | HCP: 14
An attractive downhill par 3. A typical undulating green is protected front right by a large bunker. A tricky but interesting hole to play.
Stadistics
| Black | White | Yellow | Blue | Red |
| 164 | 160 | 147 | 130 | 115 |
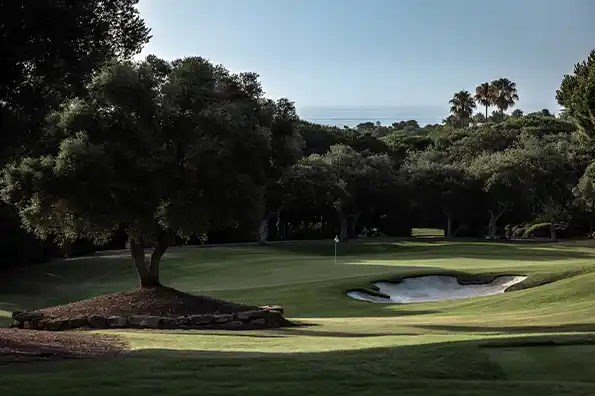
Hole 6
Par: 5 | HCP: 12
A downhill, reachable par 5. However, the deceptively contoured green is protected by a lake along the whole right-hand side that awaits stray, ambitious second shots.
Stadistics
| Black | White | Yellow | Blue | Red |
| 496 | 480 | 459 | 440 | 419 |
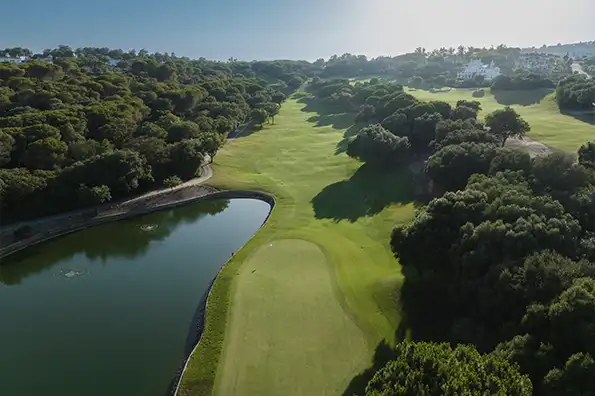
Hole 7
Par: 3 | HCP: 18
The shortest par 3 on the course, with a very tough green. Distance is not a problem but miss the green at the back and you will have a devil of a shot back.
Stadistics
| Black | White | Yellow | Blue | Red |
| 145 | 141 | 127 | 110 | 93 |

Hole 8
Par: 4 | HCP: 1
A long, difficult second shot will often tempt an ambitious tee shot. Be very careful, water extends all down the right-hand side eventually protecting a large and very well-contoured green.
Stadistics
| Black | White | Yellow | Blue | Red |
| 433 | 417 | 386 | 365 | 325 |

Hole 9
Par: 4 | HCP: 16
A short par 4. Most who try to avoid the right side bunkers from the tee are caught by the one on the left, so aim down the middle. The elevated green is long, narrow, hugely contoured with a hidden surface. Finally, it is also protected by very deep front bunkers.
Stadistics
| Black | White | Yellow | Blue | Red |
| 375 | 359 | 324 | 292 | 270 |

Hole 10
Par: 4 | HCP: 8
A tough par 4 where bunkers left and right await errant tee shots. A straight drive will leave a modest second shot, however, the well-bunkered and contoured green is one of the toughest on the course.
Stadistics
| Black | White | Yellow | Blue | Red |
| 355 | 342 | 329 | 312 | 287 |

Hole 11
Par: 4 | HCP: 6
Position the tee shot slightly right of centre and avoid going left with the second to a flatish green. The slopes feed a bunker or worse, a lake. Oh, and bunkers guard the right and back!
Stadistics
| Black | White | Yellow | Blue | Red |
| 403 | 391 | 355 | 330 | 281 |

Hole 12
Par: 4 | HCP: 13
A difficult hole due to the out of bounds along the right-hand side. Drive down the centre avoiding the bunker on the left. An elevated, highly contoured green is one of the narrowest on the course, with several bunkers standing guard.
Stadistics
| Black | White | Yellow | Blue | Red |
| 358 | 353 | 331 | 304 | 264 |

Hole 13
Par: 5 | HCP: 11
A dog-leg left, very reachable par 4. The second shot to the diagonal green is defended by a rocky water hazard at the front. The green is expansive with several contours.
Stadistics
| Black | White | Yellow | Blue | Red |
| 512 | 490 | 475 | 447 | 417 |

Hole 14
Par: 4 | HCP: 2
This most attractive hole needs care. Off the tee, avoid the left-hand bunkers to set up a strategic second, this time navigating between left and right-hand bunkers. Perhaps this holes’ greatest difficulty is the valley which divides the two-tiered green.
Stadistics
| Black | White | Yellow | Blue | Red |
| 418 | 398 | 380 | 351 | 312 |

Hole 15
Par: 3 | HCP: 7
A perfect par 3, rated the best on the course. The huge green has three well defined tiers. But water also wraps around more than two sides and three bunkers provide added protection.
Stadistics
| Black | White | Yellow | Blue | Red |
| 222 | 211 | 177 | 145 | 129 |

Hole 16
Par: 5 | HCP: 15
An enjoyable hole with a difficult tee shot. Out of bounds to the right and a lake and bunkers on the left – tricky into the wind. Hit the second hard to a wide fairway but long hitters beware, stopping the ball on this well-contoured and severely protected green is difficult.
Stadistics
| Black | White | Yellow | Blue | Red |
| 512 | 487 | 468 | 440 | 417 |

Hole 17
Par: 3 | HCP: 17
An elevated and very attractive hole with a green extending right to left over three tiers and typically undulating. Bunkers frame the front-right and back whilst water gets your attention to the left.
Stadistics
| Black | White | Yellow | Blue | Red |
| 187 | 168 | 146 | 121 | 96 |
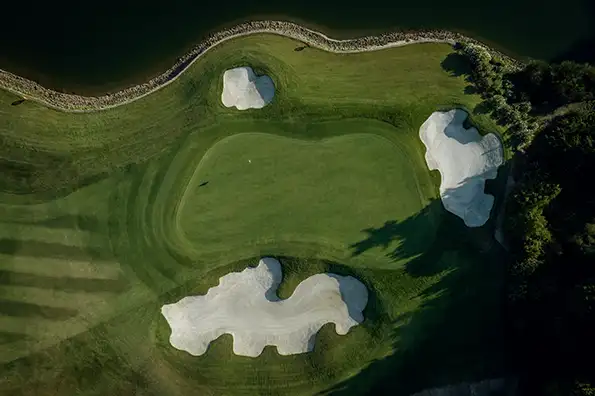
Hole 18
Par: 4 | HCP: 4
A tough finishing hole. Driving to a tight landing area with bunkers left and right. Then a second shot to an extremely elevated and undulating green, which is all about knowing your club distances.
Stadistics
| Black | White | Yellow | Blue | Red |
| 400 | 387 | 363 | 338 | 313 |


